[ad_1]
One of the common FTP clients you can use is FileZilla, an easy-to-use application that enables you to send documents from your computer to a distant server. It supports different protocols of file transfer such as website management, uploading of files, and many more. In this guide on how to set up FileZilla on Windows, we will take you through the process of easy file transfer.
FileZilla is one of the most common freeware FTP, FTPS, and SFTP clients that are employed to transfer files from a local computer to a remote server. There are several reasons why individuals and businesses choose FileZilla for their file transfer needs:
- FileZilla is a free Open Source software. As such, it is one of the cheapest options available to individuals and other low-budget companies.
- FileZilla offers an easy-to-use and user-friendly interface that beginners and experts find convenient.
- It is possible to download FileZilla as it supports Windows, macOS, and Linux.
- FileZilla provides support for various protocols such as FTP, FTPS, and SFTP.
- Filezilla supports the secure transfer of files.
- Drag and drop is supported by FileZilla which facilitates moving files and folders from the local computer to the remote server.
- The Site Manager in Filezilla helps store the address, username, password, server types, and other connection details of many servers.
- Resume is one of the functions supported by FileZilla, meaning that a transfer can be resumed from the point at which it was disrupted.
- The FileZilla interface allows for customization by choosing themes and adjusting settings to fit personal tastes and modes of operations.
- Regular upgrades allow the FileZilla to be updated for better performance, addition of some features, and tackling security issues.
Prerequisite Setup Filezilla On Windows
Buy Windows VPS or use a local computer running Windows: Filezilla works with many Windows including Windows 10, 8.1, 8, 7, XP, and earlier.
Stable Internet Connection: Make sure you are connected to the internet and can then download the FileZilla software. listade list of the main features that can be used to promote a business on the internet.
Step 1: Download and Install FileZilla
- Remote to your Windows server, and go to the official FileZilla website (https://filezilla-project.org/) and download the FileZilla client for Windows.
- Find the downloaded setup file (which is usually in the “Downloads” folder) and then double-click on it to run the installation.
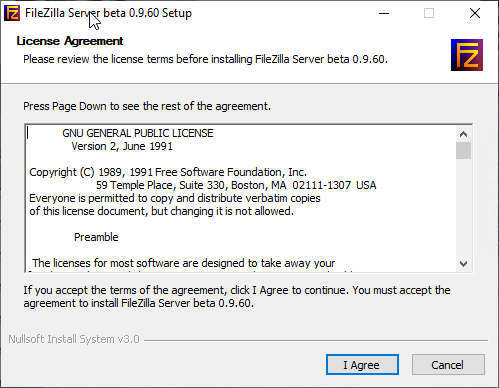
- The FileZilla installer will open. Proceed to the installation by clicking “Next”.
- Review the terms of the License Agreement and click “I Agree”.
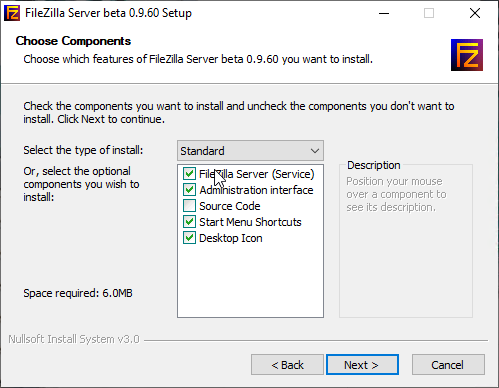
- Select the install options (usually the default is recommended) and click on Next.
- Install or change the components – choose (as usually all components are selected by default). Click “Next.“
- The user can place the destination at a preferred location for Installation or use the default one. Click “Next.”
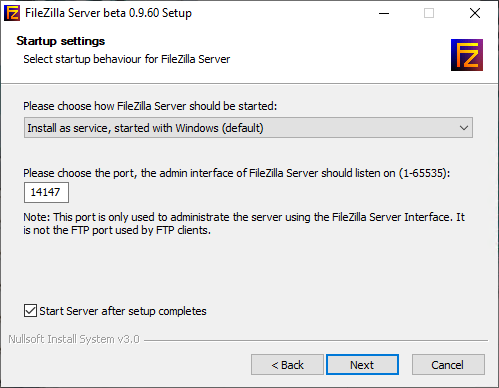
- Enter the administrator password to successfully install it, it is a step-by-step procedure guided by an on-screen instruction. In addition, you should indicate the way through which one starts FileZilla (by default) and the change of admin interface port number. You can choose the port number of FileZilla from 01 to 65535. Specify at the end whether the server is to be started upon completion of setup or not. Specify this feature by checking or unchecking the tickbox “start the server after setup completes”.
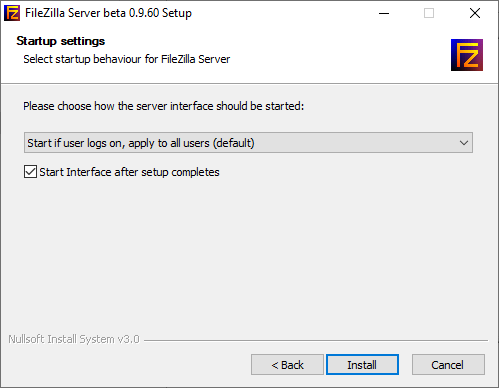
- Go to settings review and click “Install” to start the installation process.
- Wait until the installation is done. Once done, click “Next.”
- Once you get a “setup was completed successfully” message close the installer.
Step 2: Launch FileZilla
- After completion of installation, launch FileZilla either from your desktop or through a start menu.
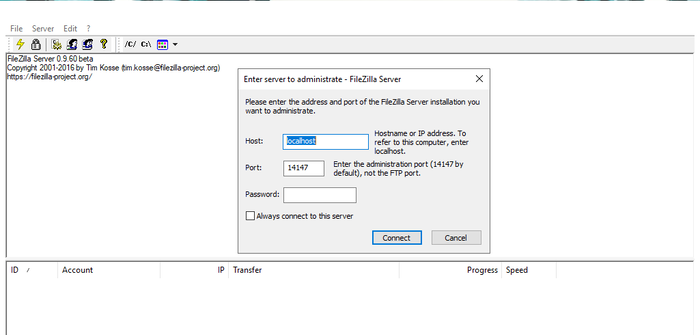
Step 3: Connect to a Server
- In the FileZilla interface, you’ll find the following fields at the top:
- Host: Provide the server address (e.g. ftp.yourdomain.com or IP address).
- Username and Password: Enter your FTP name and the password.
- Port: Typically, FTP uses port 21. On the other hand, your server admin may set a particular port.
Step 4: Choose the Transfer Protocol
- FileZilla offers transfer support with protocols like FTP, SFTP, FTPS, etc.
- Select a suitable protocol from the given list. FTP is a popular option if you’re not sure.
Step 5: Establish the Connection
- To connect to the server through the provided credentials, click on the “Quickconnect” button. Alternatively, you can save a connection profile using “Site Manager” for future use.
- If the connection is successful, you’ll find the log about the connection activity at the top part of the interface.
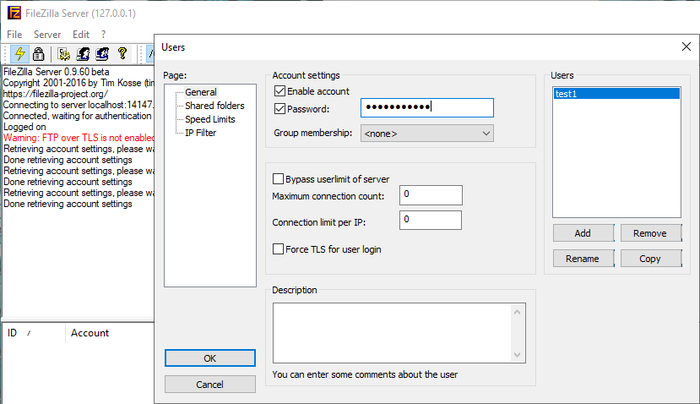
Step 6: Adding a new user on the FileZilla server.
- To create a new user, press the “Add” button in the “Users” dialog.
- In the “User” field, enter the username for the new user.
- In the “Password” field, set the password of the user. Ensure it’s a strong password.
- Make a selection of the permissions depending on your needs. Under the “Shared folders” section, you select the required permissions.
- Specify the user’s home directory. Upon connecting the user will be directed to this directory.
- In case of necessity, you will be able to impose upload/download speed limits for the user.
- Select the “OK’ button and save the user configuration.
Step 7: Working with local and remote directories.
- Your local files and directories are displayed on the left-hand side of the interface.
- These files and directories are displayed on the right side.
- Double-click on the folders and navigate through them.
Step 8: Transfer Files
- Step 8: Transfer Files
- To transfer files from your local machine to the server:
- From the left side, choose the file(s) you want to upload.
- Place them in the designated area on the right-hand side of the screen (remote server).
- In order to download a file from the server to your local computer.
Additional Tips
- Make sure you open the FTP port in your firewall.
- You can save the servers’ details in FileZilla for easy access in the future. To control your saved connections click on “File” and then “Site Manager”.
- Edit or delete your selected connection under the Site Manager.
Conclusion
Therefore, you have completed setting up FileZilla on your Windows system, and it will help you in transferring files safely from your computer to other remote servers. Its friendly user interface allows you a good file management experience, and it has strong features for that too. In case you are a developer, a content creator, or even required to transmit some data productively, consider utilizing Filezilla.

ADVERTISEMENT
[ad_2]
Source link
Leave a Reply